Helia Amumu Build


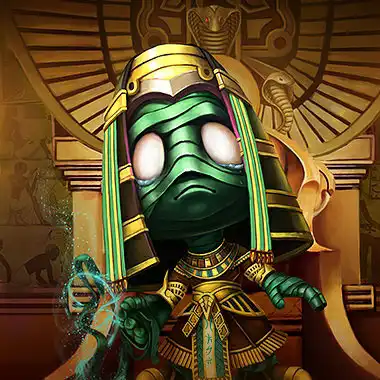
Helia Amumu build with runes and items. Helia Amumu guide offers in-depth how-to play, skill order and tips. Play Helia Amumu build in League of Legends Patch 26.12!
TLDR





Helia Amumu Runes












Optional Summoner Spells


Exhaust
Solid choice in most of the games. Helps against assassins, divers and melee overall. It also lowers your healing output as you do not take Heal. Solid choice overall.


Ignite
Offensive option, improves your damage, gives you additional cooldown to use in fights, but reduces your healing output.


Ghost
Improves mobility. You can chase, position and flee better. Reduces your healing output, but makes you more agile in fights.
How it works
- You rush Echoes of Helia.
- You play aggressively, dealing damage to get Echoes of Helia stacks and spend them as soon as you can.
- More damage means more Helia procs, which means more healing. Raw damage items outperform heal and shield power support items.
Playstyle
Play aggressively, deal damage and poke to stack Echoes of Helia.
Trigger Helia as often as possible with abilities, runes, summoners and items.
Support allies while dealing damage to enemies.
How to play
- This is an off-meta and very fun build that works on ANY champion with mana - even those without healing or shielding abilities! All thanks to Diadem of Songs + Echoes of Helia combo.
- With Diadem of Songs + Echoes of Helia combo, you can continuously heal your team while dealing damage.
- Play aggressively, stack Echoes of Helia and heal! More damage = more Helia stacks = more healing.
Core items
- Start with Tear of the Goddess and try stacking it ASAP. Get Echoes of Helia #1, then Diadem of Songs #2.
- Core order: Echoes of Helia -> Diadem of Songs -> Liandry's Torment. If you are stacking Tear very slowly, get Liandry's before Diadem.
- Heal and shield power items and traditional support items are less effective than raw damage - you literally heal more with Helia by dealing damage.
Buffing your team
- Ardent Censer is worth it if you have auto attackers on your team (ADCs, auto-attack bruisers). It will trigger often enough to be good buy.
- Bandlepipes is a good item that gives MS and buffs your allies Attack Speed when you slow/immobilize enemies. Good for your auto attackers.
- Staff of Flowing Water is great if you have AP champions on your team. You'll be proccing it frequently with your support abilities.
Damage items
- Once you have your core items, look for Ability Haste and for raw damage.
Runes
- Alternatively you can take Summon Aery rune. On enchanters, Aery's shield directly procs Helia. On non-enchanters, it contributes to damage output to stack Helia faster.
Adaptation
- Your team needs to engage or position? Get items like Shurelya's Battlesong.
- Your team getting poked to death? Consider getting Redemption and/or Locket of the Iron Solari.
- If you cannot manage to stay alive - get Kaenic Rookern or Warmog's Armor (caution: needs enough HP!).
- Remember to counter the enemy team. If they have lots of healing, get Oblivion Orb early.
Tips and Tricks
Champion
General
- You have great engaging tools - Bandage Toss (Q) and Curse of the Sad Mummy (R)! Always play with the team and do not be shy and do not wait for 'special moment'!
- If enemy is juking left and right, just walk close to them (or Q to something close to them) and R! And lock them with your Q later.
![Cursed Touch]() Cursed Touch (Passive)
Cursed Touch (Passive)


- Remember to auto attack to apply your Cursed Touch (Passive), enemy takes 10% true damage from all magic damage they take, including yours as well as your allies!
- You can auto attack multiple enemies and your Despair (W) refreshes it. This way you can maintain multiple debuffs at the same time.
- You can apply your Cursed Touch (Passive) AoE thanks to your Curse of the Sad Mummy (R) as well.
![Bandage Toss]() Bandage Toss (Q)
Bandage Toss (Q)
- You can use Bandage Toss (Q) to escape. Just Q to a minion or enemy champion that is far away.
- Q through dying minions - time your Bandage Toss (Q) to pass through a minion as it dies to surprise enemies hiding behind wave.
- You will still dash to the enemy, if your Q is blocked by Spell Shield. Be careful!
- To elevate your Amumu gameplay and land easier Qs - look other direction and pretend going somewhere else, this way you can land more and easier Qs!
- Bandage Toss (Q) uses position at the end of the cast time. Meaning you can walk back and it still uses original location. This can distract enemies and catch them off guard, thinking you are not going to hit it (because you moved further away).
- You can buffer Q during CC - if rooted or stunned, Q will cast immediately when CC ends if pressed during lockout
![Despair]() Despair (W)
Despair (W)
- You can activate Despair (W) during Bandage Toss (Q) animation.
![Curse of the Sad Mummy]() Curse of the Sad Mummy (R)
Curse of the Sad Mummy (R)


- Before big fights, position in fog of war (outside of view of enemy team) or simply in bushes. Enemies won't respect your engage range if they don't see you.
- Against spell shields, Bandage Toss (Q) first to pop shield, then Curse of the Sad Mummy (R) immediately after.
- Curse of the Sad Mummy (R) stops dashes mid-animation and prevents abilities during stun. You can use it to interrupt enemy channeled ults.
Amumu Combos
- Simple and easy, but excellent combo that wins fights is: Bandage Toss (Q) or Mark (Snowball) to a minion + Flash into an enemy team + use Curse of the Sad Mummy (R).
- You can Curse of the Sad Mummy (R) then Flash into enemy team for surprise.
- You can even Curse of the Sad Mummy (R) + Tantrum (E) then Flash into enemy team for burst and surprise.
Riot
- Amumu is highly dependent on teammates, so try laning with your friends for maximum effectiveness.
- Cooldown Reduction on Amumu is very strong, but it's often difficult to itemize for it. Grab the Golem buff whenever possible to gain Cooldown Reduction without sacrificing stats.
- Despair is very effective against other tanks, so make sure you're in range of opponents with the highest Health.
Skill Order
- Bandage Toss
![Amumu [object Object] ability.]() Q
Q
- Despair
![Amumu [object Object] ability.]() W
W
- Tantrum
![Amumu [object Object] ability.]() E
E
- Curse of the Sad Mummy
![Amumu [object Object] ability.]() R
R
Items


